 |
 |
 |
 |
 |
 |
 |
 |
 |
 |
|
The Greentree Naturals Pumpkin Project™The Pumpkin Project is a wonderful opportunity to connect school children with farming and get them to think about how a pumpkin plant grows. Anytime you bring nature into the learning process, children are naturally motivated. What better way to plan for the future than to share a farming project with the local school children on your farm? We need to cultivate our future farmers and one way to encourage this is to start with the kindergartners and first graders. It is important to be involved in the community that you are living in. We typically start planning the Pumpkin Project with a local kindergarten or first grade teacher in March or April so they can work us into the lesson plan to include a biology lesson that includes how a pumpkin grows. We are willing to work with two or three classrooms each year to grow pumpkins for the students. We will provide the pots, soil, labels and pumpkin seeds, plus come and visit the classroom to assist with the planting of the pumpkin seeds. Each class will grow their pumpkins for 3-4 weeks, and then have a field trip to Greentree Naturals to transplant their pumpkins onto the farm. Each pumpkin plant will have a tag or stake with the child’s name on it so when they return in the fall, they can harvest a pumpkin from the plant that they transplanted in the springtime. Because this program has been well received in our community over the years, I am providing an outline of how to host your own Pumpkin Project with the hope that more farmers will consider doing this wherever you live. It is easy to find teachers at elementary schools interested in becoming involved in this type of project. And if you are a teacher looking to find a farmer to partner with, I suggest contacting your local farmers market. It is important to acknowledge that working with spring kindergarten students, when they return to harvest pumpkins in the fall, they will be first graders. That said, you will need to have a conversation with the next grade teacher to make sure they are willing to participate in a field trip to the farm for pumpkin harvest.
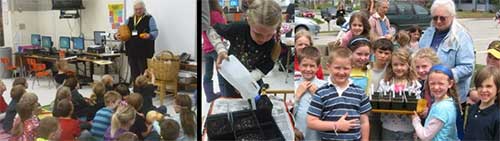
Where to begin your Pumpkin Project?In early March or April, make contact with a local elementary school teacher about the possibility of partnering with them to host a Pumpkin Project on your farm. If you don’t know any teachers, just call the main office of the closest elementary school to your farm and ask if they can put you in touch with a kindergarten or first grade teacher. You want to give them plenty of time to work this into their lesson plan, and get permission slips for a field day. Typically, we find out when the last day of school is scheduled to allow time for the class to grow their seedling pumpkins up to a size that will provide timely transplanting into our gardens. We also are looking at making sure we set a transplanting date for the seedling pumpkins to go into the field after our last frost date in the spring. Once you come up with the appropriate timeline, then it is time to make a date for you to go into the classroom to plant pumpkin seeds. This timeline may vary depending on your last frost date. Make an appointment with the teacher, usually sometime in early May, to come to the school. You will need to know how many students are participating ahead of time so you have enough pots and seeds to satisfy your project needs. I often keep a few pumpkins in cold storage over winter so we have a pumpkin to look at and to use as an example for talking about what we are going to do. When I go into the classroom, I take 4” pots already filled with potting soil, tags for each plant so they can write their name on the tag, and enough pumpkin seeds to give each child 2 seeds per pot. You might also want to find out ahead of time if the classroom has enough light from a south facing window or grow lights to get the seedlings started and growing. Once the children have planted their seeds; you will need to water them in. What you need for the classroom:
*I always plant pumpkin seedlings at home on the same day that we plant in the classroom to assure we have extras to replace in case any get broken in the transplanting phase, or in case any of the pumpkins don’t grow well in the classroom, we can replace them too.
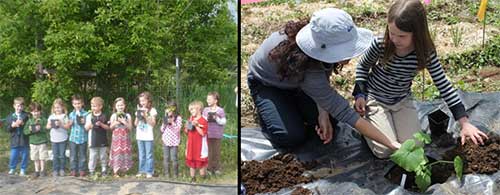
Doing the Classroom Activity1. Have the students brainstorm a list of foods that come from plants. You may want to point out that many plant foods are not obvious. French Fries come from potatoes, catsup comes from tomatoes, and bread comes from wheat, cornbread comes from corn, and so on. Don’t forget the pumpkin pie, pumpkin bread, pumpkin pudding, pumpkin pancakes, and pumpkin cupcakes! List their suggestions on the chalk board. 2. Point out that all of these foods come from plants, and all of these plants started as seeds. How does a plant grow from a tiny seed? There are many directions you can take to include basic biology into your session. 3. Divide the students into groups and distribute the pots of soil and seeds. 4. Once students have planted their seeds, have them place their name tag in each pot and water in the seeds. Suggest that they keep a daily diary of what happens from the planting day. They can note the date the seedling emerged from the soil, and measure its growth every day. Drawing a picture of their pumpkin seedling as it grows is also a fun project. It is important that the seedlings be turned daily to keep them from getting elongated if they are in a window and that time is allowed for the plants to harden off prior to planting out at the farm site. Schedule a date a week before school lets out for the season to have the children come to the farm to transplant their seedlings out into the field. The planting area should be ready for transplanting the seedlings. We usually place a weed mat down that already has holes cut in it with the appropriate spacing for pumpkins. Since the school year often ends before the last frost date in our area, we will place wire hoops over the row and attach some sort of frost protection over the seedlings for the first several weeks to assure survival and minimize transplant shock. We suggest at least one parent per 3 children for supervising the transplanting on the farm.
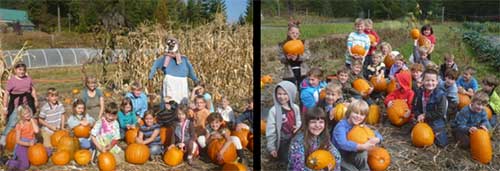
In the fall, after the children have returned to school, and the frost is on the pumpkin, the kids return to the farm to harvest their pumpkins. You may want to have a conversation with your insurance agent regarding having children coming to the farm to assure you have the appropriate liability coverage that you need for an event like this. We charge $5 per pumpkin when the children come to the farm to harvest their pumpkin, which helps to defer the cost of pots, seeds, tags, liability insurance, and time investment. Anyone that has grown pumpkins knows that they vine and intertwine with each other. With the stakes marked with each child’s name, each student has a starting point. Have the parents help to find the children’s name on the tags. Prior to their arrival, we go through and make sure names are easily seen, and that there is at least one sizable pumpkin at the end of each pumpkin vine. We have added pumpkins from other plants to assure satisfied children, as some prefer a larger pumpkin than what is growing there. The kids get so excited with the pumpkin harvest! The children’s enthusiasm will keep us repeating this project year after year.
As farmers, we often tend to isolate ourselves from our customers. Having a successful small business means letting the public know who you are. By participating in a project like this, you have a great opportunity to educate children and their parents. I would like to encourage you as growers to include an educational component with your spring planting this year. You have an excellent opportunity to invite the local and regional press to report on any part of your Pumpkin Project. While the press does not like anyone self promoting, they love stories about children and most of the time will be happy to include a blurb about your farm.
|

2003 Rapid Lightning Road, Sandpoint, Idaho 83864 • 208-263-8957 • info@greentreenaturals.com
Site Design by Logical Expressions, Inc.